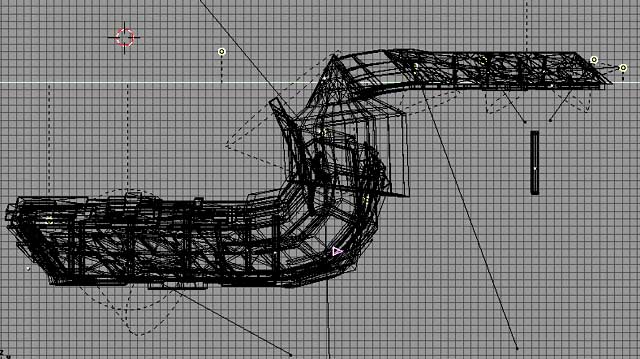
Below you can pick out the camera position for the Ruins Room shot. It's pink. There's the elbow drop that nearly finished me. Here it looks like a harmless cylinder capped by a cone. At the upper right is the Ruins tunnel. The right border is where it connects to the central Exchange and also the camera position for the tunnel shot.
Yellow circles are light sources. Dashed lines mark area lights; solid lines mark the direction and distance of spotlights while the dashed cones show the spot's coverage. Spots can be modified brighter, harder edged, or softer as well as scaled, colored, and moved.
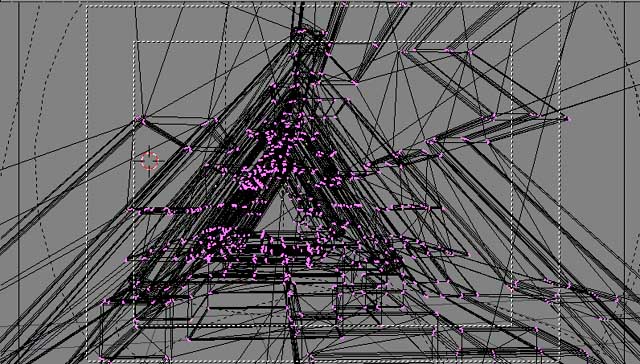
This is the camera eye view looking
into the tunnel. White rectangles mark the actual extent of the camera if this
were to be rendered and the tunnel image produced. I've switched the tunnel
mesh into edit mode; the pink dots are what I select and move with the mouse
to change the size and shape of the tunnel.
You might've noticed that this mesh looks different from some of the others,
those with single black lines with more even grids. That's because this mesh
was converted from NURBS curves and they were beveled to create the uneven plates
which compose the tunnel walls. Each black line converging at the pink points
marks a beveled edge. You can see what the beveling looks like by switching
over to the Skins Room wall meshes.
back to the map